

How To Insert Ship To In Quickbooks Email Template
Learn how to personalize your sales forms and add the info that matters most to your business.
QuickBooks Online gives you the tools to create attractive, professional-looking invoices, estimates, and sales receipts. Custom sales forms are a simple and effective way to enhance your business' brand.
You don't need to be a designer to make eye-catching designs. And they let you control what info your customer sees.
You can customize the appearance and layout of your sales forms. Once you create your masterpiece, save it as a custom template so you can use it at any time. The steps are a little different if you are a new QuickBooks customer as of March 2020. Follow the steps for your version.
Am I in Business or Accountant view?
https://youtu.be/b51wvS-4g1w
If you use QuickBooks Online Essentials, Plus, Advanced, or are in Accountant View
You can create separate templates for your invoices, estimates, and sales receipts. You can also have multiple templates for each form.
Step 1: Create a new template
- Go to Settings ⚙ and then select Custom Form Styles.
- Select New Style.
- Select the type of form you want to create.
Step 2: Design your template
You'll see a preview of your changes as you make them. Whenever you're ready to save your changes, select Done.
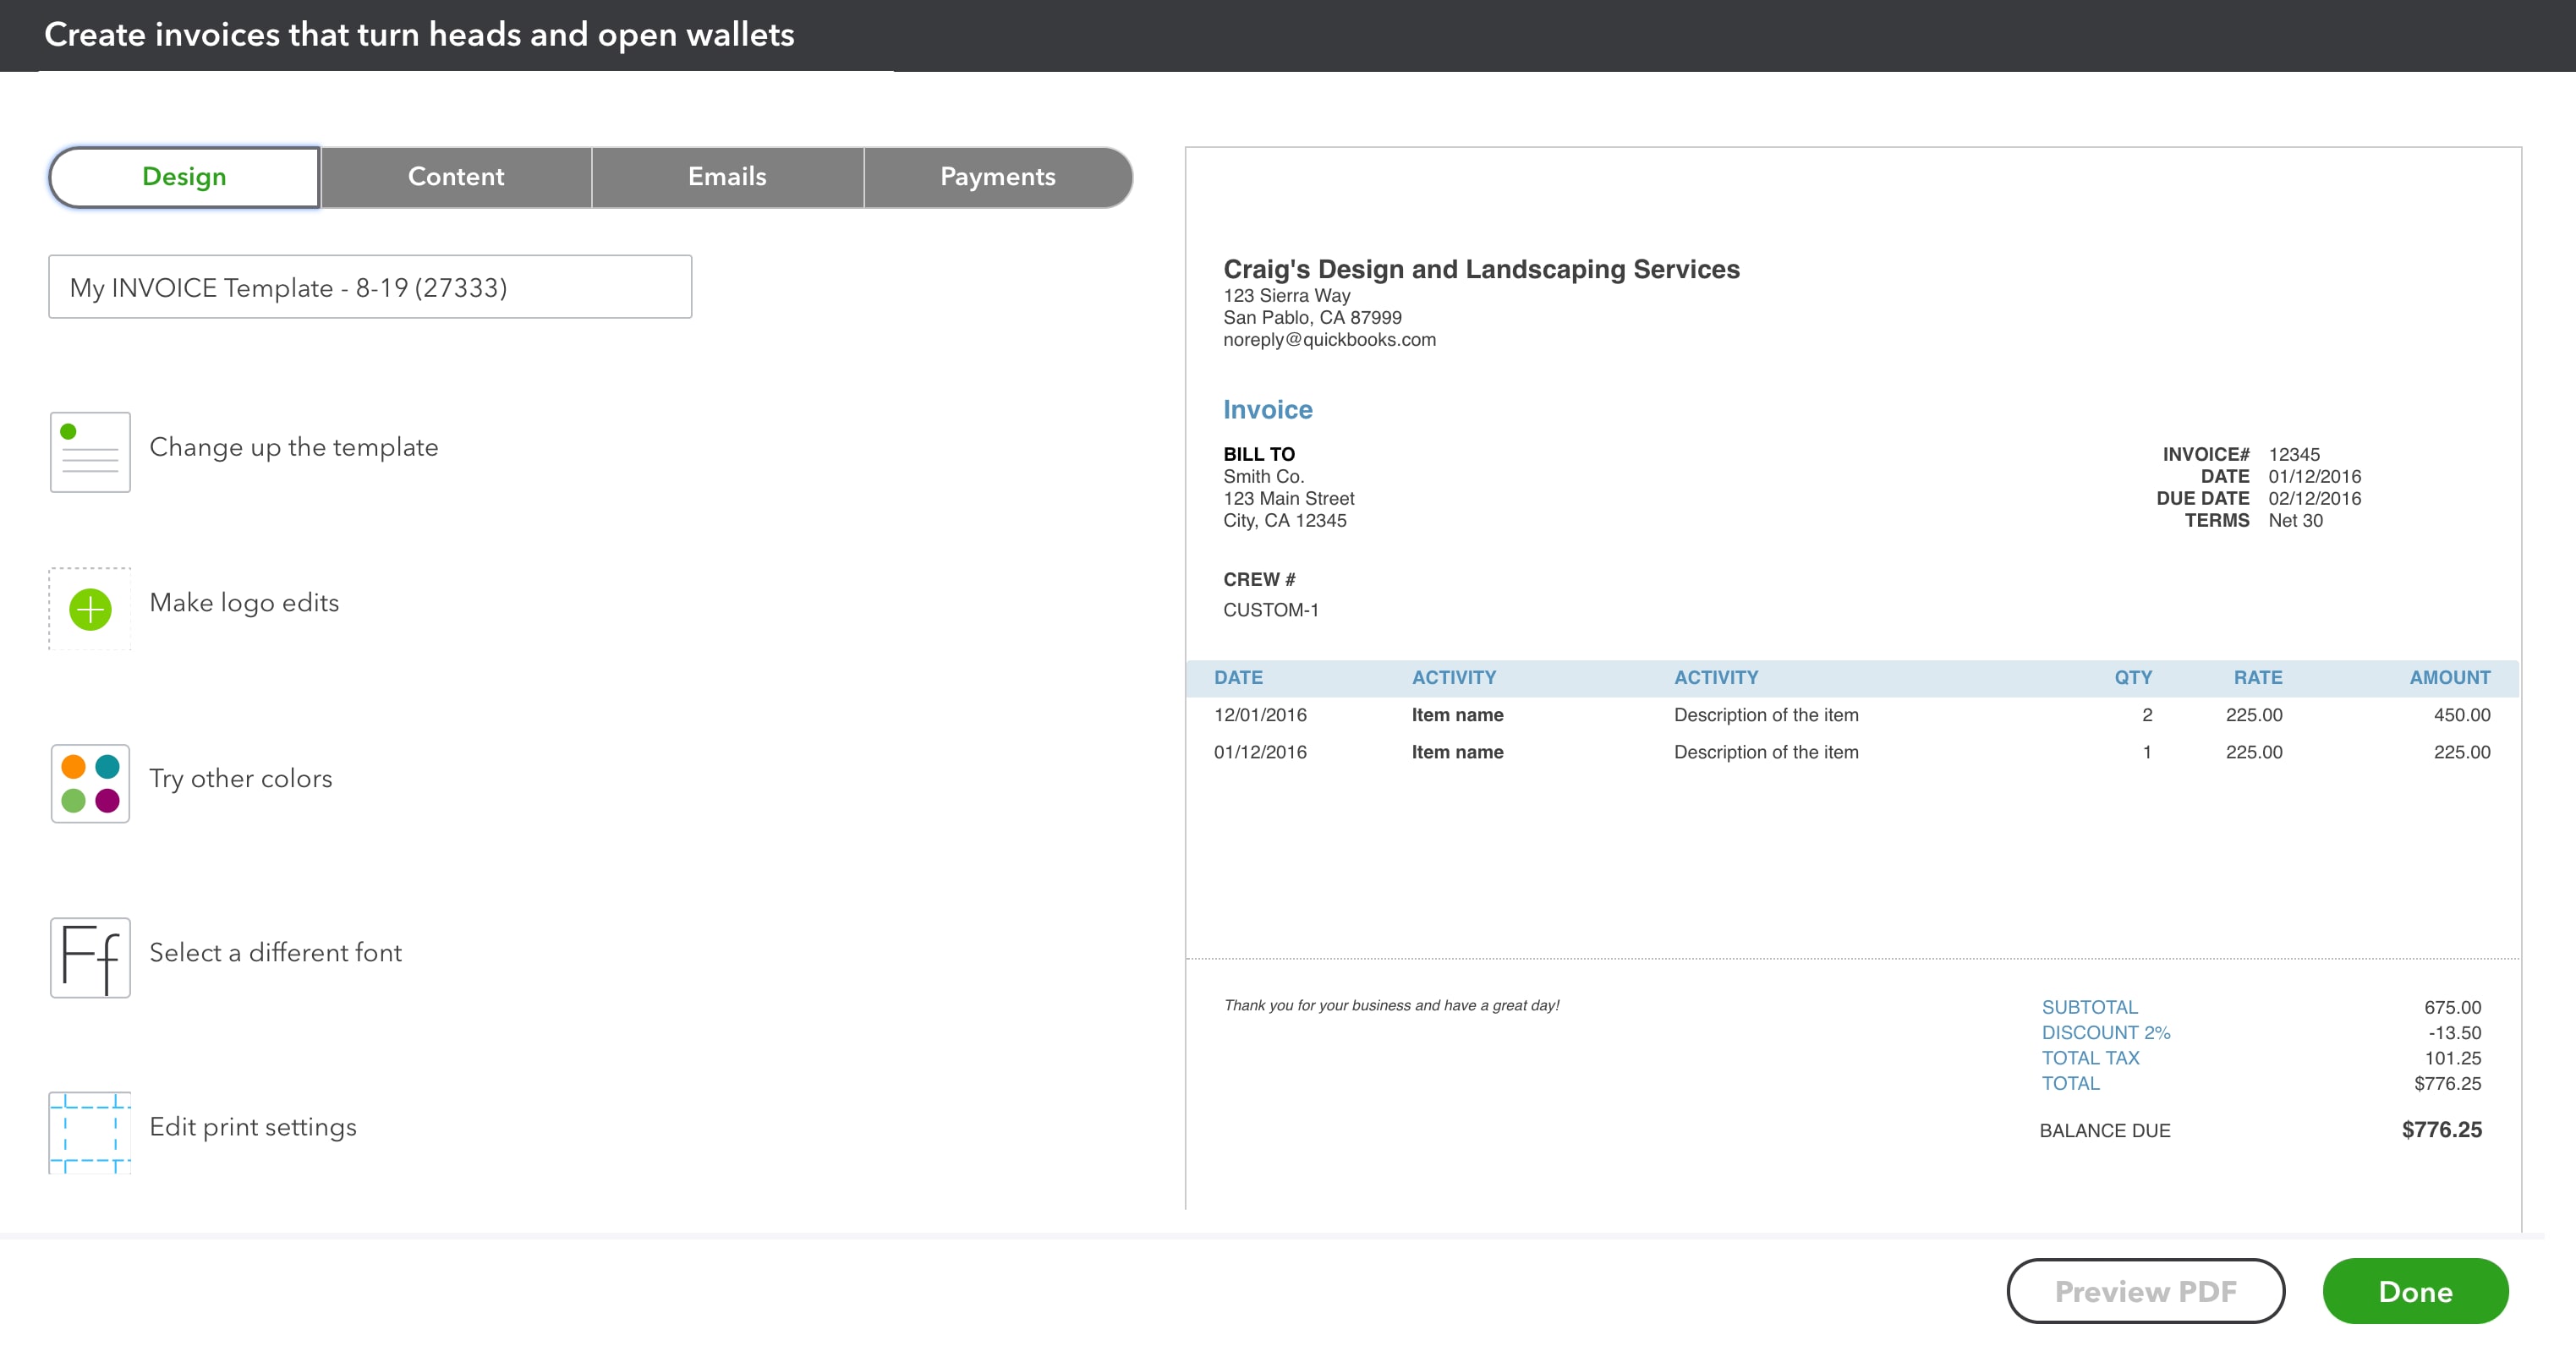
To adjust the general layout and look of your template:
- Select the Design tab.
- Give your template a name.
- Select Dive in with a template to choose a layout. These layouts are fixed. We recommend the Airy Classic. If you want to add SKUs orcreate progress invoices, you need to use Airy Classic.
- Select Add your unique logo to upload a new logo.
- Select Splash on some color to pick a color scheme. You can also enter a hex code to use a truly custom color.
- Select Get choosy with your font to change the font and size.
- Select When in doubt, print it out to adjust the margins. This is important if you send printed formsto your customers.
Create a custom logo
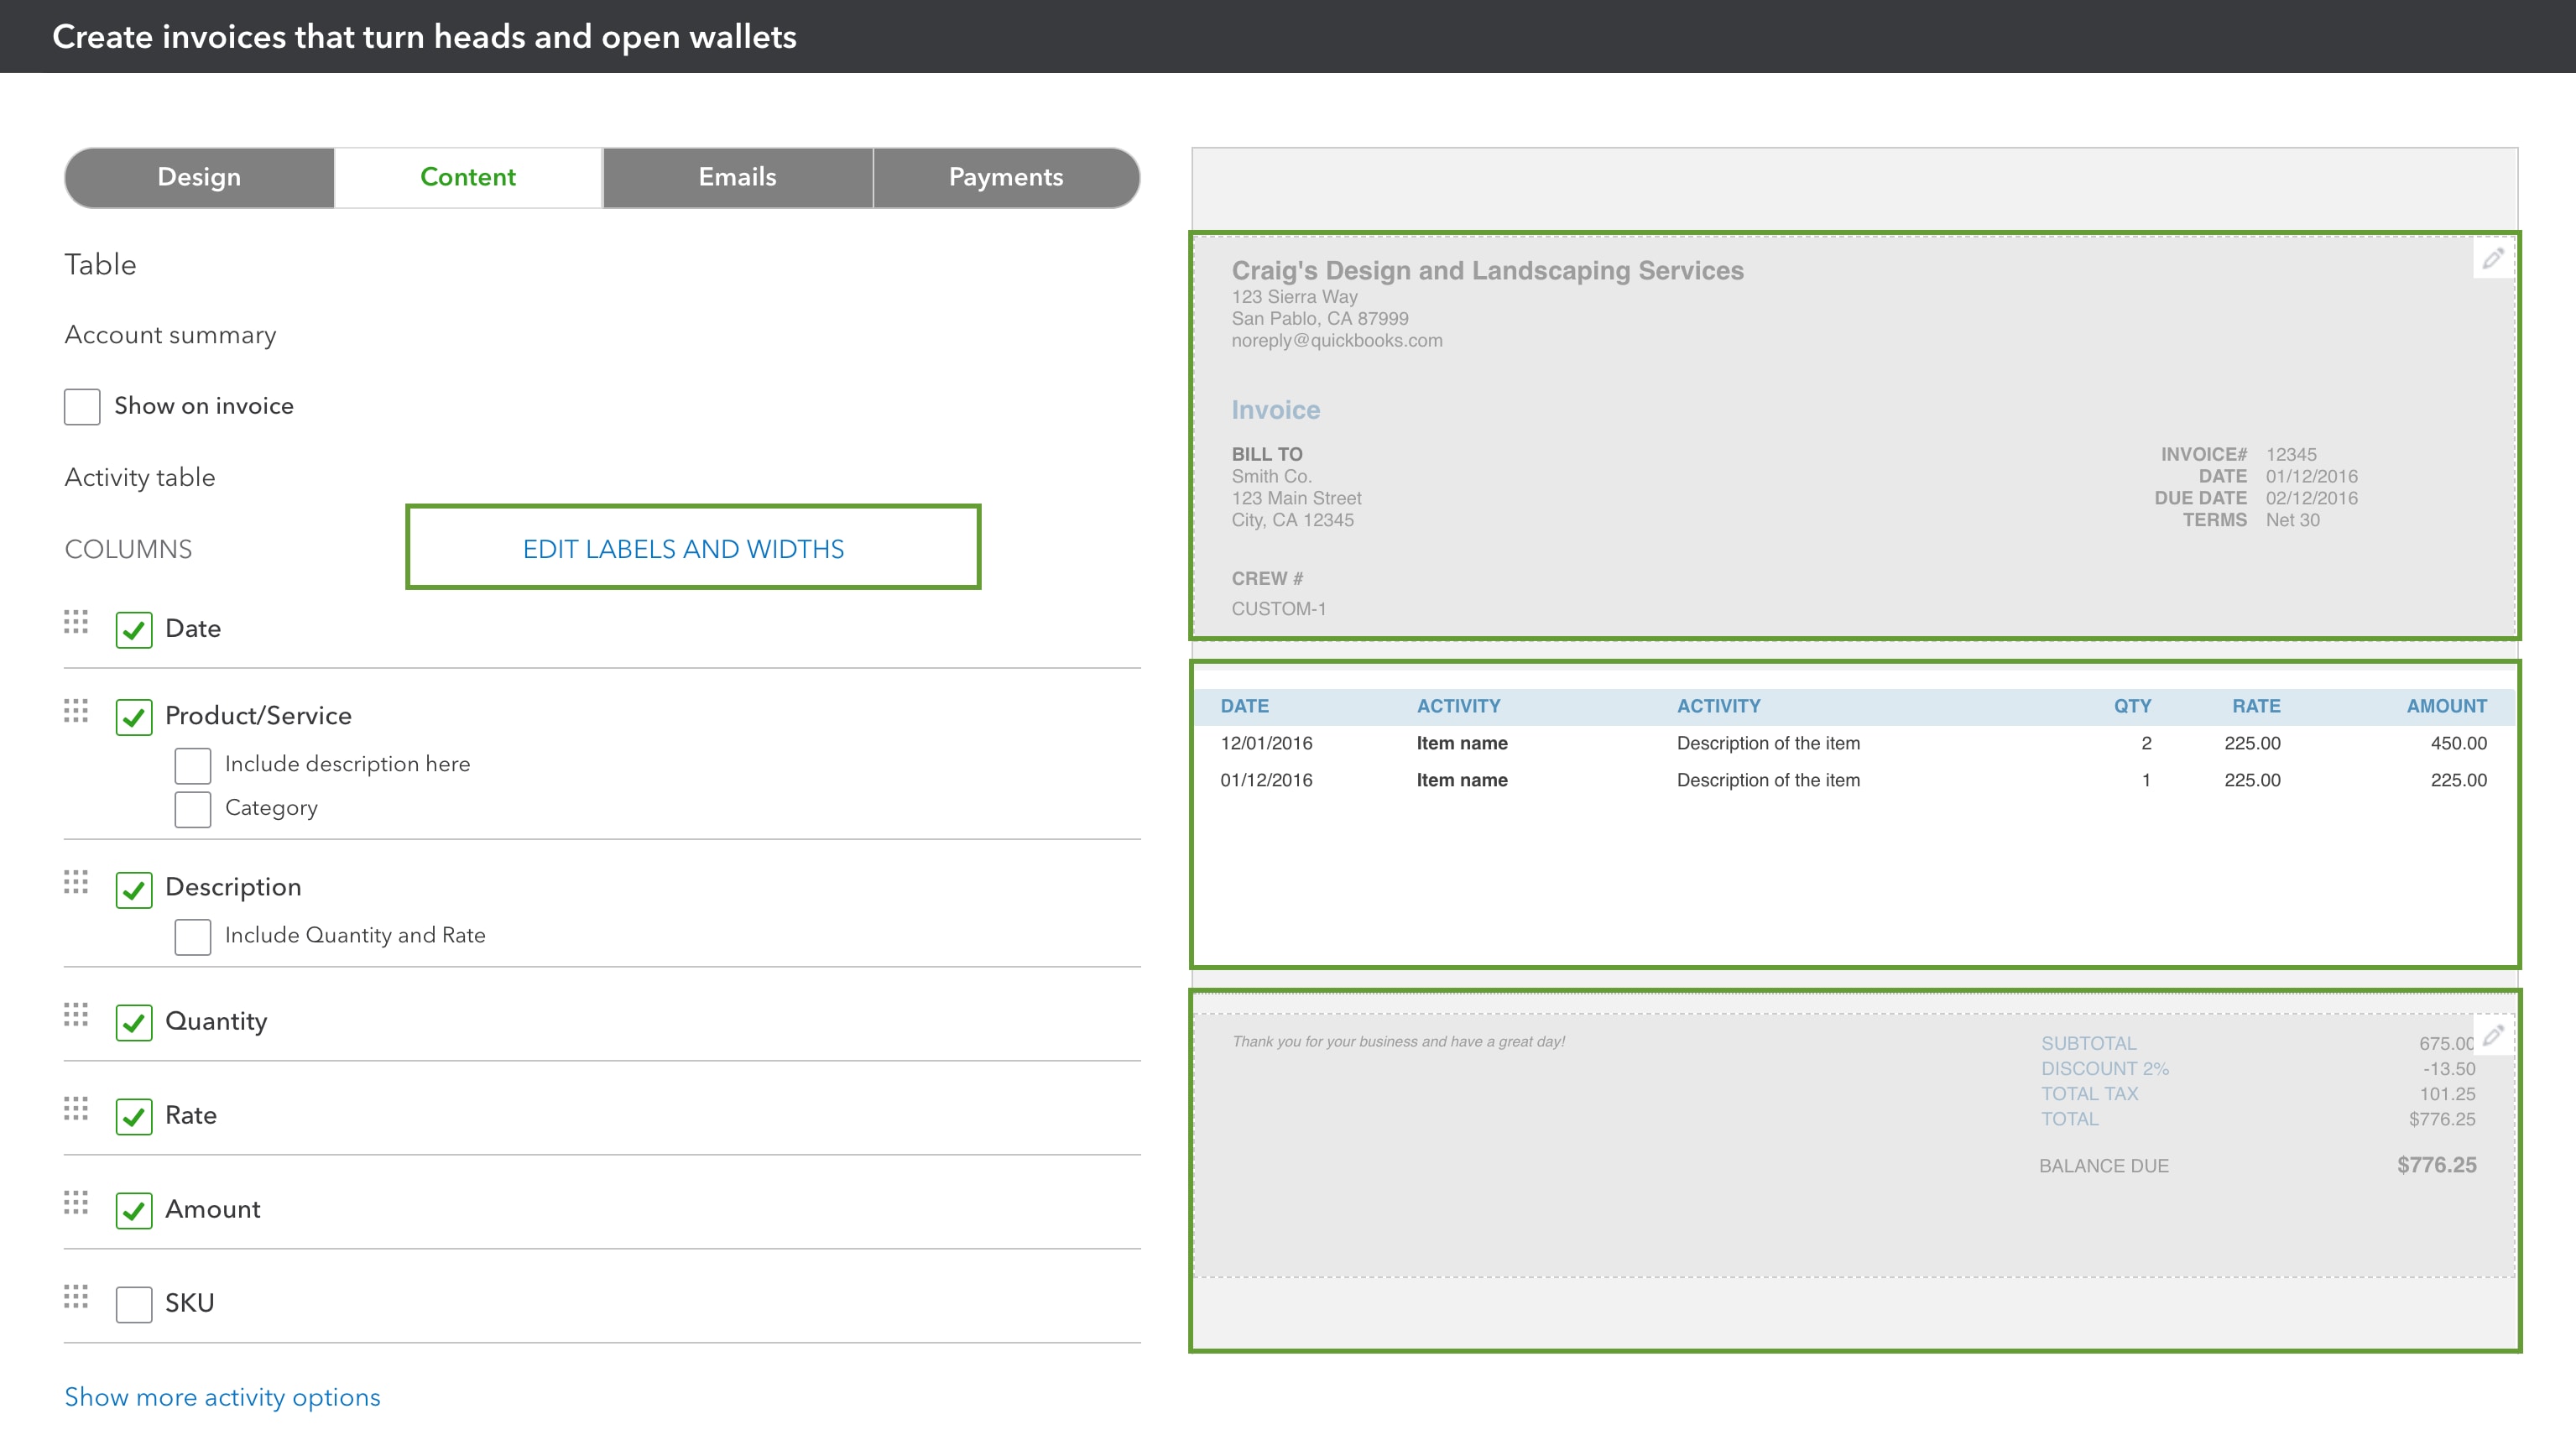
Step 3: Customize the info on your forms
Go to the Content tab to start customizing the details. Forms have three sections: header, table, and footer.
Select a section on the sample form to edit the fields. You'll edit each section separately. You can edit, add, or remove data fields on custom forms. You have many options. We won't cover them all, but here are a few highlights:
Change data field labels
- Select one of the sections (header, table, or footer). If you select the table section, select Edit labels and widths first. Then you can edit the data fields.
- Select a data field.
- Enter a new label.
Edit your company info
Your company info automatically appears in the header. Remove or edit the fields if you want customers to only see certain info.
- Select the header section.
- Edit the fields.
- Select and uncheck the box to hide a field.
Show or hide data fields
- Select one of the sections.
- Select the checkboxes to show or hide fields.
Add custom fields in the header section
- Select the header section.
- Select + Custom field.
- Enter a label for the custom field.
You can add up to three custom fields.
Add invoice numbers
- Select the header section.
- Select the Form numbers checkbox.
Add or remove item descriptions
-
- Select the table section.
- Select Edit labels and widths.
- If you want add the description in a single column select the Product/Service checkbox and then select the Include description here checkbox.
- If you want to add the description in a separate column, then select the Descriptioncheckbox.
- Select and uncheck the box to remove the description.
Change column widths
- Select the table section.
- Select Edit labels and widths.
- Use the sliders to adjust the width.
To remove a column completely, select and uncheck the column label's checkbox.
Reorder the columns
- Select the table section.
- Select Edit labels and widths.
- Drag the square icon next to a data field to a new spot on the list.
Step 4: Personalize your email message
Make things personal and change the message customers see when they get their invoice or sales receipt. If you want to use your default messaging, you can skip this.
In the Custom Form Styles window, go to the Emails tab. You can change the subject line, greeting, and message body. You can even customize reminder emails.
Step 5: Turn on online payments for invoices
If you want to get paid faster, let your customers pay their invoices online.
By default, invoices aren't set up for digital payments. You need to turn on QuickBooks Payments. This is an add-on payment processing service.
If you haven't already, you can turn on payments once you're finished customizing your form:
- Select + New.
- Select Invoice orSend Invoice.
- In the Online Payments section, select Finish setup.
- After you sign up, go back to the invoice. Select and check the payment options you want to make available.

Learn more about QuickBooks Payments.
Step 6: Apply a template to an invoice, sales receipt, or estimate
QuickBooks uses whatever you set as your default template each time you make a new invoice, sales receipt, or estimate. You can also select a specific template for specific transactions directly on the form:
- Create or open an existing invoice, sales receipt, or estimate.
- Select Customize in the footer.
- Select a custom template from the list.
Step 7: Edit custom templates
To manage your custom templates, select Settings ⚙ and then Custom Form Styles.
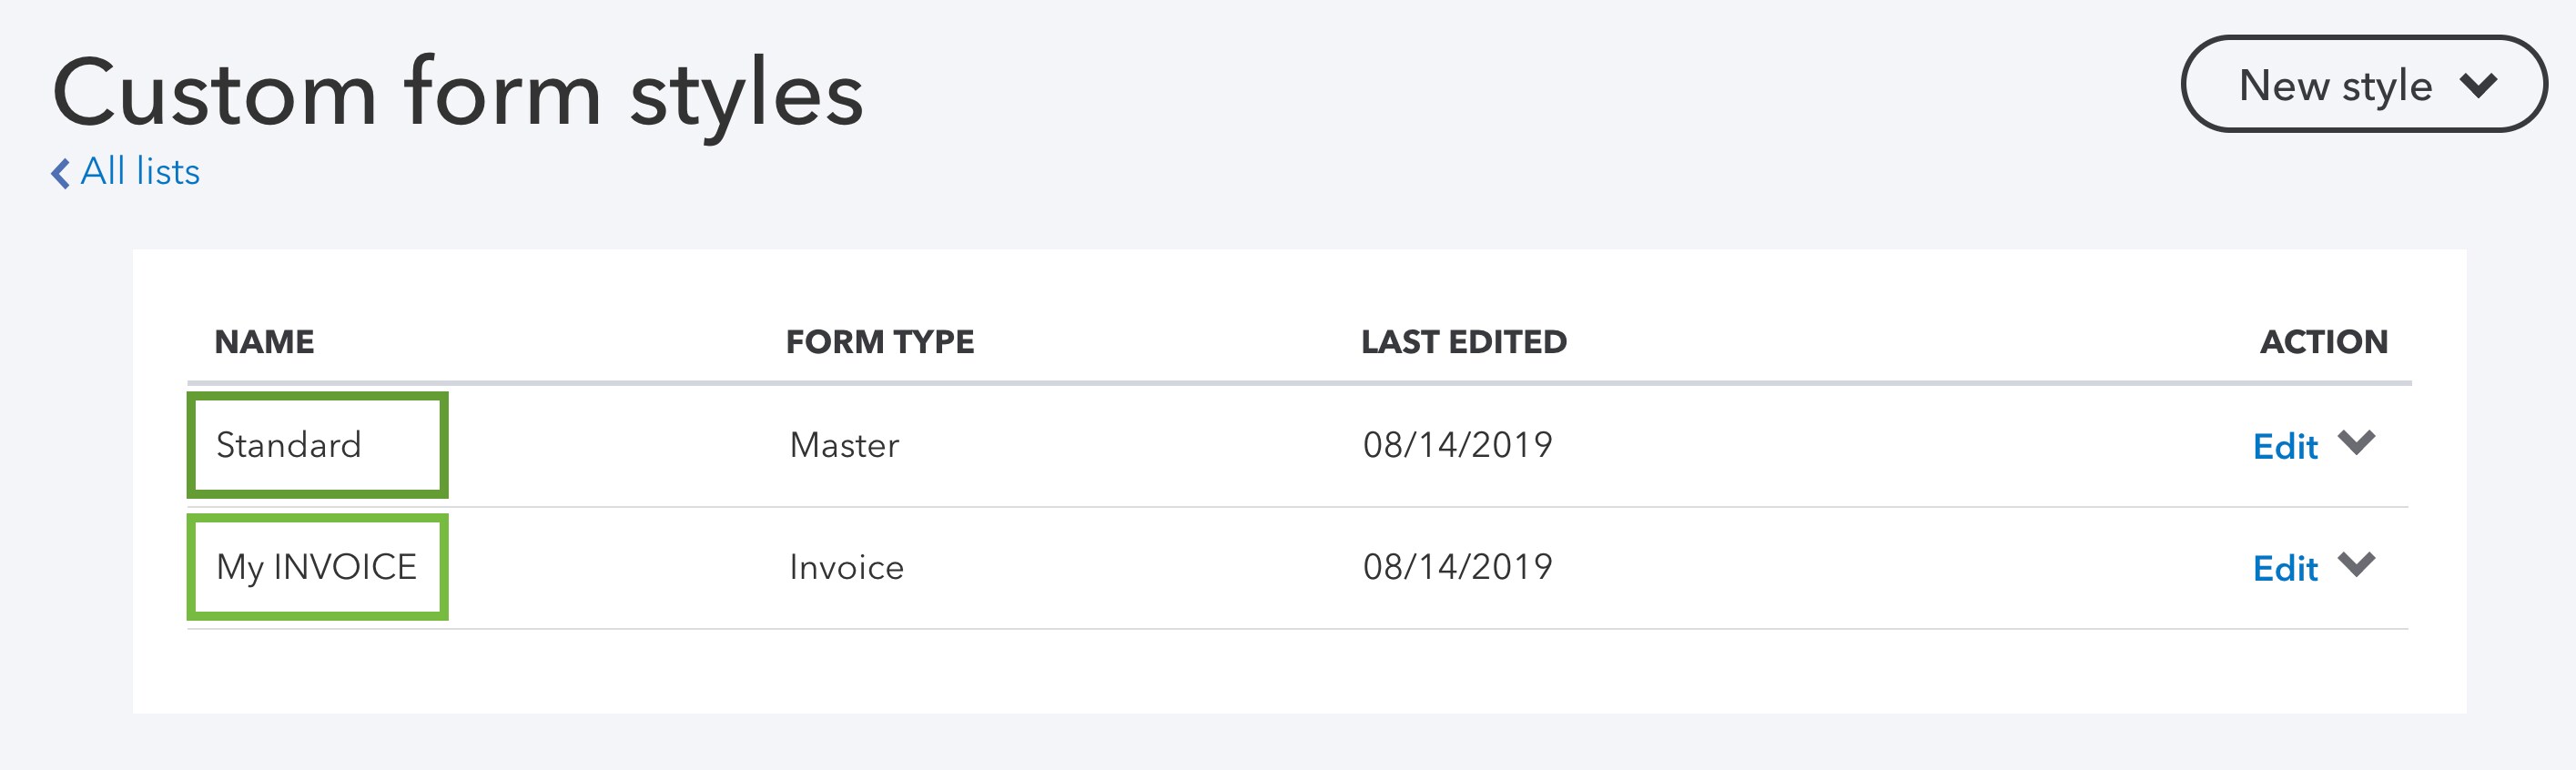
QuickBooks creates a standard template based on the first custom template you create. It's your default for invoices, sales receipts, and estimates. To set one of your custom templates as the default:
- Find your template.
- Select the ▼ in the Action column.
- Select Make default.
To edit a custom template:
- In the Custom Form Styles window, find your custom or standard template.
- Select Edit in theAction column.
If you use QuickBooks Simple Start or the simple invoice template in Business view
All the tools you need to customize invoices are on the form itself.Note: In QuickBooks Simple Start, you can have one invoice template at a time. You can customize invoices, but not other types of sales forms.
- Create or open an invoice.
- Select Edit company and decide what company info you want your customer to see customers see.
- Select Save when you're done.
- Select Add logo to upload your logo.
- Select Settings to start customizing the layout and appearance.
Customize your invoices
You can add fields, change the color scheme, and enable payments directly on the invoice form. Here are just a few things you can do:
- Select the Invoice details section.
- Select the Terms, Ship to, Form numbers or Due Date switches to add or remove these fields from the form.
- Select the Invoice details section.
- Select the Add field switch to create a custom field. You can name the field whatever you'd like.
- Select the Totals section.
- Select the Sales tax switch to turn it on.
Important: Sales tax isn't turned on by default. If you need to collect sales tax and haven't set it up yet, select Activate. Here are detailed steps forhow to set up sales tax.
- If you've set up QuickBooks payments, select the Payments section to turn on payment options for your customers.
- Select the Look and Feel section to change the colors, font, and logo. Tip: You can enter a hex code in the Color field if you want a truly customized color.
- Select the Email section. Personalize the message your customers see when they receive their invoice.
When you're done customizing, select Hide or Settings to close the customization window. Then finish your invoice.
Switch from back to the old invoice template
If you decide you need more customization options or need features like deposits and discounts, the simplified template may not be for you.
To go back to the old invoice format, open an invoice, and select Classic View. Important: This switch is permanent. Once you switch back to Classic View, you can't use the simplified format anymore.
How To Insert Ship To In Quickbooks Email Template
Source: https://quickbooks.intuit.com/learn-support/en-us/payments/invoice-email-template/00/610853
Posted by: johnsonpublearnow1999.blogspot.com
0 Response to "How To Insert Ship To In Quickbooks Email Template"
Post a Comment